dive travel - viaje de buceo (1)
Dive Travel, How to Prepare Yours?  A Complete Guide
17/05/2023
PADI Replacement Card - carnet PADI (2)
PADI Replacement Card: How to Replace Your Certification Card When Lost
25/05/2023
Show all

Freediving Breathing Techniques or How to Increase Lung Capacity for Diving

Freediving breathing techniques… “These Dressel Divers folks have lost their minds! Why would a SCUBA diver want to know how a freediver breathes? Or rather, how they don’t breathe? Because the last time I checked, they hold their breath. And the first thing they told me in the Open Water course was: never stop breathing.”

Well, no, we haven’t gone crazy. We’ll explain the reason right away. But first, take a look at our table of contents.

Freediving Breathing Techniques - Técnicas de respiración en apnea

1. What Are the Benefits of Freediving Breathing Techniques for A SCUBA Diver?

We all breathe, about 16 times per minute at rest. But perhaps you haven’t stopped to think about how it works. It turns out that our cells need oxygen to survive, and we obtain it when we inhale. At the same time, we need to get rid of carbon dioxide (CO2) particles, which we do when we exhale.

Now here’s the interesting part: if we don’t eliminate enough CO2 as it is produced, our brain tells our lungs to speed up breathing.

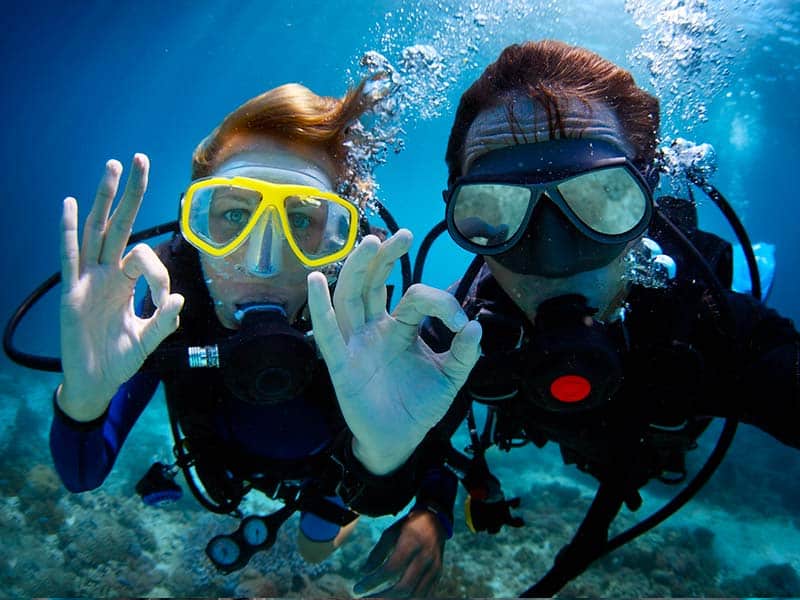
Yes, CO2 is the villain that makes us breathe faster! That’s why they tell SCUBA divers, “Never hold your breath.” Because if you do, you’ll only accumulate carbon dioxide in your body, and your brain won’t allow it! It will scream at you to ventilate faster, and that’s not what we want, because it means using more air, right?

Okay, but I want my tank air to last longer. How can I achieve that?


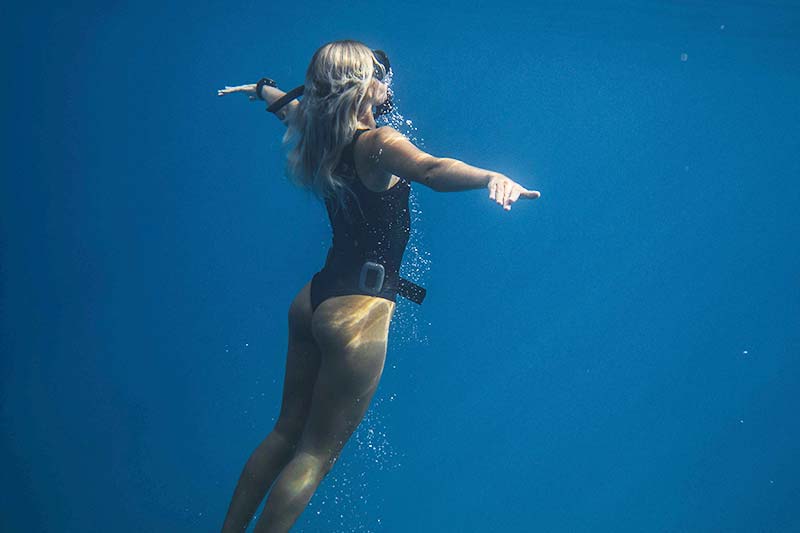
1.1. Benefits of apnea training to reduce air consumption

Good question! Let me tell you about the benefits of freediving breathing techniques training to reduce air consumption.

Excessive muscle movement, exposure to cold, and stress increase the production of CO2 in our bodies. So, if we want to make our breathing slower and reduce our air consumption, we need to relax, avoid sudden movements, and dive with proper insulation. But that’s not all, there’s an even more interesting way! By increasing lung capacity.

What does that mean? Simple: if we have larger and stronger lungs, we can manage air more efficiently and breathe fewer times. Ta-da! Apnea training and breath-holding techniques can help us in this task.


1.2. Breath-holding: other benefits for diving

Breathing like a freediver puts you in a natural state of relaxation in the parasympathetic nervous system. In fact, a 2013 study showed that freedivers had significantly lower levels of stress, anxiety, and negativity compared to non-practitioners of this sport. Bingo! We mentioned earlier that stress increases the production of CO2. So, apnea breathing techniques also help in that regard.

It increases self-awareness underwater. There’s a saying, “If you want to explore your outer world underwater, use a tank. If you want to explore your inner world underwater, don’t use it.”

Scuba divers do breathe underwater, but mastering freediving breathing techniques can clear the mind. They call it mindfulness. Just kidding. What’s not a joke is the fact that mental clarity while diving is vital. When you dive, you have to be focused to avoid mistakes.

Donald Noble, an expert from Emory University in the United States, helps us understand it better. freediving breathing techniques help us breathe slower and deeper. The sensation of chest expansion comes from a set of elastic sensors that measure lung growth.

When you exhale and your diaphragm relaxes, the movement of your chest presses against blood vessels, activating a second group of special sensors called baroreceptors found in our arteries.

They all send signals to the brain. And here’s the interesting part: when we breathe deeply, this constant and repetitive stimulation can synchronize activity in other brain regions. What does that mean? Slow and relaxing brain waves that lead you to a serenely alert state.

Freediving breathing not only reduces stress but also improves your mood. During this practice, your body releases neurotransmitters that make you feel good, such as adrenaline, noradrenaline, and dopamine.

Freedivers also efficiently utilize their oxygen, which is advantageous both in the water and on land. Optimal use of oxygen translates into more efficient breathing, a lower heart rate, lower blood pressure, increased blood flow to vital organs, and overall better health.

Freediving Breathing Techniques - Técnicas de respiración en apnea - 4

2. Freediving Training for Breath-Hold, Or How to Increase Lung Capacity

The following breathing techniques are based on SDI recommendations for freedivers.


2.1. Diaphragmatic breathing

Diaphragmatic breathing is an exercise practiced by various individuals to induce relaxation. Freedivers do it too.

This breathing technique activates the diaphragm, which is located just below the lungs. When you inhale, your diaphragm contracts and moves downward, creating space in your chest cavity for your lungs to expand. If done correctly, your abdomen expands outward, as if you’re inflating a giant balloon in your belly.

To practice this dry freediving training, follow these steps:

  1. Sit or lie down in a comfortable position.
  2. Place one hand on your chest and the other just below the ribs on your abdomen.
  3. Relax your shoulders and release any tension you may feel in your body.
  4. Inhale slowly through your nose, allowing your abdomen to expand outward.
  5. Exhale gently through your mouth, as if making a “Sss” sound. You’ll notice your abdomen gently contracting.
  6. Repeat this breathing exercise for 10-15 minutes per day.
  7. Remember, the key is to find the right rhythm for you. Follow this rule: use twice as much time to exhale as you do to inhale. For example, you can inhale for 5 seconds and exhale for 10 seconds.


2.2. Segmented breathing exercise

To increase flexibility and lung capacity, freedivers utilize the segmented breathing technique derived from yoga.

To understand how it works, we divide the chest cavity into three sections: the stomach, intercostal muscles, and chest. As we breathe, we focus on each section separately to optimize performance in that area.

STEP 1: BELLY/DIAPHRAGM BREATHING Begin with the stomach section. Sit or lie down, relax your shoulders, and place one hand on your stomach and the other on your chest. Concentrate on slowly expanding your belly as you inhale through your mouth. Fill only the stomach for 5 seconds, reaching 50% – 60% of its capacity. Then, exhale passively, allowing the air to leave your body slowly for 10 seconds, returning the stomach to its initial position. Keep your ribs and chest still. Continue for 2 minutes.

STEP 2: INTERCOSTAL BREATHING Now, shift your focus to the intercostal muscles, expanding the ribs sideways with each inhalation. Maintain the same timing and percentage of filling. To ensure proper execution, place your thumbs on the sides of your ribs and let your fingers touch the bottom part of the sternum. As you inhale and expand your ribs, you’ll feel your fingers separate. Exhale as before. Repeat the exercise for 2 minutes.

STEP 3: CHEST BREATHING Conclude this freediving technique by focusing on the chest. Maintain a comfortable posture and concentrate on filling the upper part of your lungs to 50% – 60% of their capacity for 5 seconds, then gently exhale for 10 seconds. Remember, during inhalation, the belly and ribs should remain still, while the chest slightly expands forward and upward.

Freediving Breathing Techniques - Técnicas de respiración en apnea - 6

2.3. Square or box breathing technique

This technique, also known as Box Breathing, helps with relaxation and improves lung capacity.

The key to this freedive training is maintaining a smooth and relaxed rhythm as you breathe. You can start with 3-minute sessions and gradually increase the duration over time.

How to perform Box Breathing? Follow these simple steps:

STEP 1: Take a deep breath through your nose, filling your lungs effortlessly, while counting to 4.

STEP 2: Hold your breath for a count of 4.

STEP 3: Exhale slowly through your mouth, relaxing your chest for 4 seconds.

STEP 4: Keep your lungs empty for another 4 seconds. Repeat.


2.4. Lung stretching

This method is slightly more intense, so it is only recommended to practice it after completing a physical warm-up.

Basic Full Lung Stretch:

  1. Sit with your legs crossed and your back straight.
  2. Place your right hand on the ground beside you.
  3. Breathe gently and hold your breath.
  4. While holding your breath, slowly raise your left arm above your head and move it towards the right side, creating a C shape.
  5. You will feel a pleasant sensation of expansion in your chest.
  6. Maintain the position for 20 to 30 seconds and then exhale slowly.
  7. Repeat the exercise on the left side.


Light Exhalation Stretch:

This stretch is used to increase the residual volume of the lungs and is performed as follows: exhale until there is no air left in your lungs, close the epiglottis or vocal cords (the mechanism that prevents water from entering your lungs when you drink). Then, inhale. This will raise the diaphragm and stretch it.


2.5. Carbon dioxide (CO2) and hypoxia (O2) tables

It turns out that when CO2 begins to accumulate because we are not exhaling it, it triggers a series of events in our brains. There are “detectives” called brain chemoreceptors that measure our body’s pH and, in turn, the amount of CO2 in it, driving us to breathe.

Well, this breath-holding technique for apnea allows us to train our body to tolerate lower levels of pH.

Note: This freediving breathing exercise should not be performed more than three times a week.

CO2 Tables

Let’s say you’re Kate Winslet, who broke Tom Cruise’s apnea record. She held her breath for 7 minutes and 15 seconds. That’s her maximum; you need to find yours. To do this exercise, Kate should perform 8 breath holds for half of that time, approximately 3 and a half minutes. Between each breath hold, she would breathe normally but gradually reduce this “rest” time, with the first rest being 3 minutes and 30 seconds.

O2 Tables

In these tables, the rest time would remain at 3 minutes and 30 seconds for all 8 breath holds, and what increases gradually is the time that the breath is held, reaching 3 and a half minutes.

When you can comfortably complete a table without suffering, it’s time to level up and try a more challenging one!

2.6. Apnea Walking

This exercise is performed by apnea divers to increase their tolerance to CO2 because it is done while moving, which leads to increased CO2 levels. It’s important to note that if you’re going to do apnea walking, do not do it alone. Go with someone who can accompany you because you may experience a blackout. If any problem arises, your partner can help ensure a safe landing in case of a fall. They should not hold onto you as it can cause harm. It’s simply about letting yourself fall. Here are the key steps for a successful apnea walk:

  1. Sit down and breathe for 2-3 minutes to lower your heart rate and oxygenate your blood.
  2. Take a deep inhalation and hold your breath.
  3. Continue holding your breath until you feel contractions in your diaphragm.
  4. Stand up and walk at a normal pace.
  5. Keep walking until it becomes necessary to breathe again.
  6. Take a recovery breath and mark the distance you reached.
  7. Return to the starting point and repeat the process.
  8. Aim to complete between 6 and 8 repetitions in one day.

In conclusion, freediving breathing training can be beneficial for SCUBA divers. While the basic instruction for divers is not to hold their breath, freediving breathing techniques can help reduce air consumption and improve lung capacity. Are you daring enough to give them a try?

SUBSCRIBE TO OUR NEWSLETTER