Sidemount diving isn’t just a gear change, it’s an underwater revolution.
If you’re looking to unlock your potential, gain control, and take your diving to the next level, you’re about to discover something that will change the way you dive forever.
But don’t expect the usual boring explanation filled with technical jargon you barely understand:
You know how it goes, the more complicated the language, the less you actually know.
If you read this article, you’ll understand everything perfectly.
Get ready to leave the familiar behind and dive into a whole new world.

Playa del Carmen Cenote Tours
18/06/2025
Snorkeling in Akumal (The Turtle Bay)
02/07/2025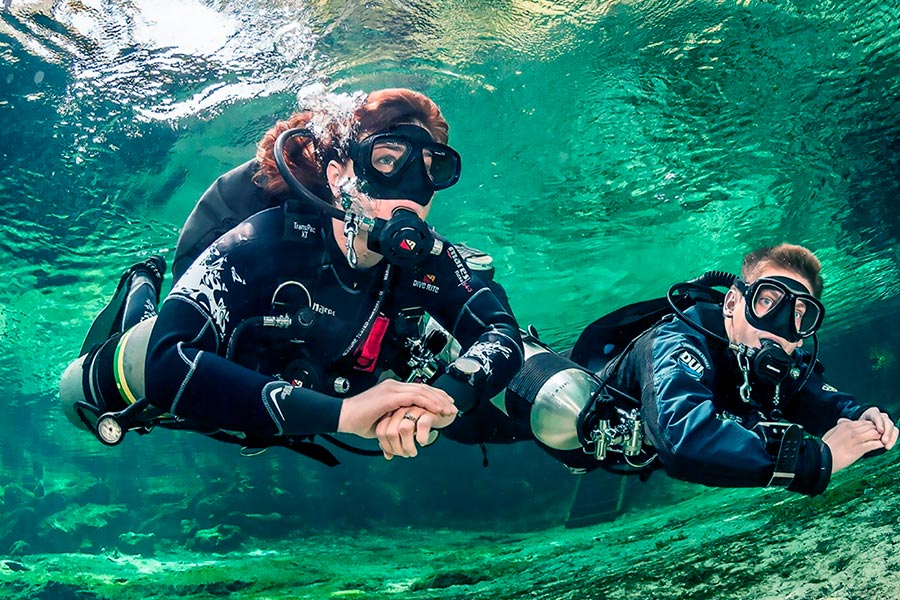
1. What Is Sidemount Diving and Why Should You Consider It?
Sidemount diving isn’t some passing trend. It’s simply a different, and for many, better, way to dive.
So, what’s the difference?
Instead of strapping tanks to your back (like with the classic back mount setup), you wear them on your sides. That’s why you’ll also see it written as side mount scuba diving or just side mount.
But… why would anyone do that?
Let’s break it down.
A Quick Bit of History
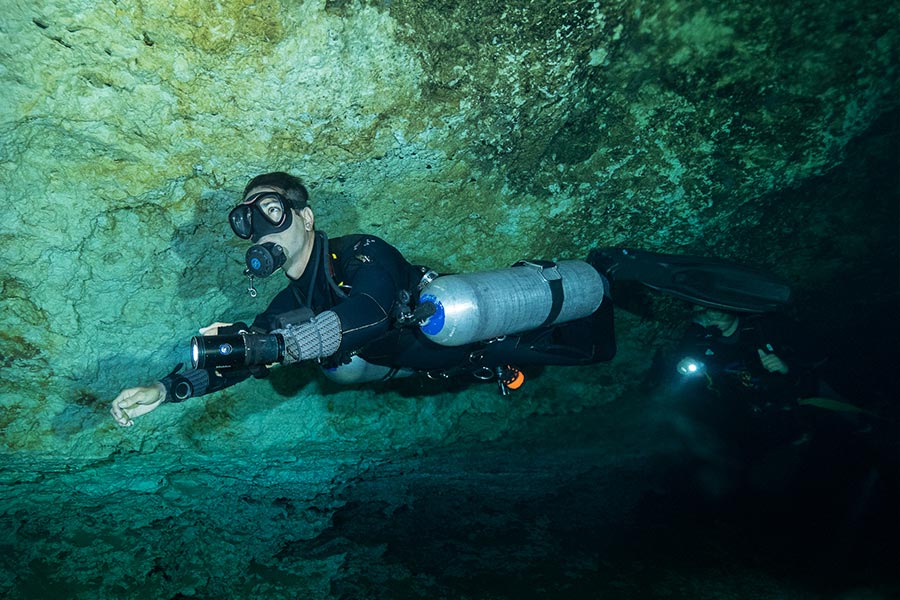
Sidemount diving was born in tight spaces, literally.
Cave divers needed to squeeze through narrow passages. And with one or two tanks strapped to their backs… there was just no way through.
So, someone said, “What if we hang them on the sides?”
And it worked.
So well, in fact, that it’s no longer just for cave diving.
It’s used in wreck diving. In technical diving.
And more and more often, by divers who just want extra comfort, control, and safety, even if they’re just exploring open water.
2. What Are the Advantages of Sidemount Diving?
Here’s the short, clear, no-fluff version.
Comfort and Transport
With side mount scuba diving, you put on your harness and clip on the tanks once you’re already in the water.
No need to lug all that weight while hiking down the beach or climbing into the boat.
If you’ve got back or neck issues, sidemount diving can be a total game-changer. Not kidding.
Hydrodynamics and Trim
With the tanks at your sides and a proper sidemount diving setup, your position in the water improves a lot.
You float better, swim straighter, and need less effort to move.
Less effort = lower air consumption.
More bottom time. Longer dives.
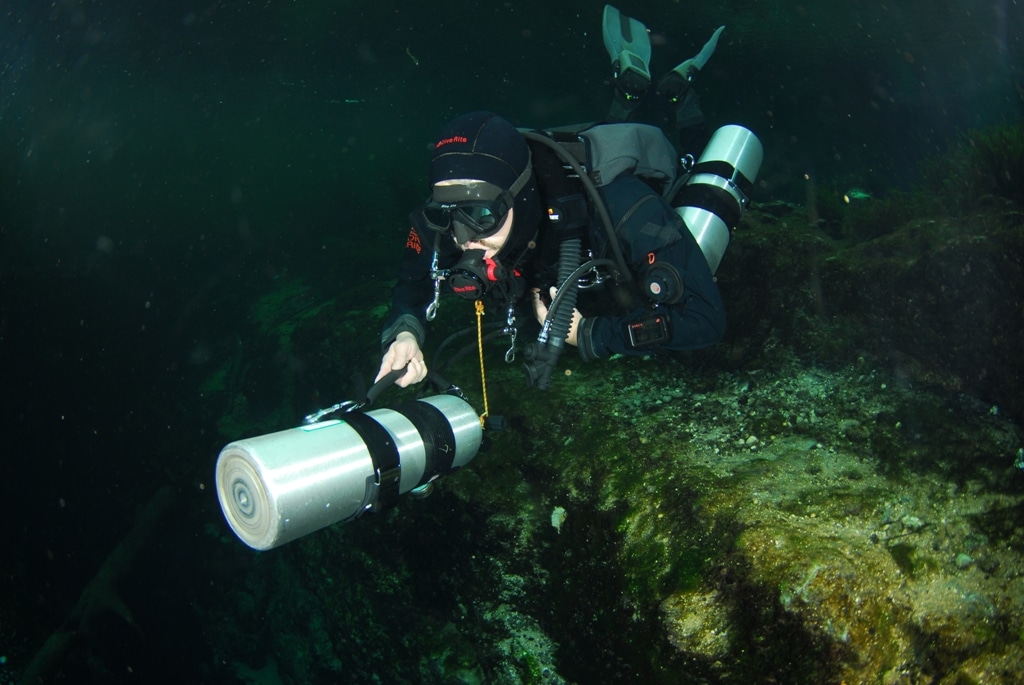
Access to Tight Spaces
Sidemount diving was made for this: squeezing through places where backmount just won’t fit.
Caves, wrecks, crevices, things that used to be “no way I’m going in there” become “let’s see what’s inside.”
If you’re curious by nature, you’ll love it.
Redundancy and Safety
You carry two tanks. Two first stages. Two second stages. Two SPGs.
Everything is doubled. Everything is independent.
If something fails, you’ve got a fully functioning backup.
That’s not paranoia, it’s responsibility. Especially on more technical or extended sidemount dives.
Flexibility and Customization
The sidemount scuba setup is a universe in itself. You can tweak the harness, hoses, clips, tanks (side mount tanks), everything.
Each diver tunes their gear to fit their body and their diving style.
If you love tinkering with your gear and understanding how everything works, scuba sidemount will totally hook you.
And there are sidemount BCD models out there that adapt to all kinds of diving, from recreational to full cave.
Some are considered among the best on the market (best sidemount BCD, as they say).
There’s only one downside…
Once you try side mount diving and learn to set it up right, there’s no going back.
3. Sidemount vs. Backmount – Which Setup Is Right for You?
This isn’t about which one is better.
It’s about which one fits you, your diving style and what you want from your time underwater.
Both systems do the same basic thing: let you breathe below the surface.
But how they do it? That’s a whole different story. And it seriously changes the experience.
Let’s break it down.
Backmount
The classic setup.
Two shoulder straps. One tank on your back. And off you go.
You know it. It’s what they teach in every beginner course. And it works.
But its not perfect:
- Accessing the valves? Tough. If something goes wrong back there, you need a buddy.
- Buoyancy can be tricky to master, especially if the gears not dialed in just right.
- All the weight sits on your spine. Literally.
And when it’s time to haul your gear on land… yeah, your back will remember.
Still, it’s a solid choice if:
- You dive occasionally and want something simple.
- You prefer to rent gear when you travel.
- You don’t want to overthink setup.
Simple. Functional. Comfortable.
Sidemount Diving
With sidemount scuba diving, tanks go on the sides.
Like wings. And that changes everything.
No heavy load on your back.
No gear hanging off the center.
Full access and control over your setup.
Plus:
- Got a leak or issue? You see it. You fix it. No help needed.
- Buoyancy is on another level, streamlined, effortless, and horizontal.
- You can squeeze into places backmount can’t go, caves, wrecks, tight spaces.
- Always redundant. Two tanks, two regs. More air. More safety.
The catch?
It’s not plug & play.
It takes work to configure. You need to adjust, learn, and fine-tune.
But if you enjoy geeking out on gear and honing your technique, you’ll love it.
Key Differences at a Glance
| Feature | Backmount | Sidemount Diving |
| Tank position | On the back, fixed | On the sides, adjustable |
| Equipment access | Limited – needs help in emergencies | Full – you see and manage everything yourself |
| Buoyancy | Good (with proper setup) | Excellent (if configured correctly) |
| Redundancy | Optional – requires twin set | Built-in – always two tanks |
| Versatility | Great for recreational dives | Ideal for tech and exploration |
| Out-of-water comfort | Heavy – tough to carry | Light – easy to transport and gear up |
| Setup complexity | Fast and easy | Requires learning and tweaking |
| Dive types | Open water, standard dives | Caves, wrecks, tight spaces |
| Diver profile | Casual or recreational diver | Technical, advanced, or curious divers |
| Upfront cost | Lower | Higher (BCD, training, extra gear) |
4. Who is Sidemount for?
There’s no one-size-fits-all answer.
It depends on you, how you dive, and what you’re after.
- You’re new or dive casually:
Go with backmount.
It lets you focus on fun, not on your gear.
Rent it, set it up, enjoy the dive. - You want more control and safety:
Then sidemount diving is your thing.
Visual access. Redundancy. Extra air.
It’s especially handy in low-vis or silty bottoms. - You have back issues:
Many divers switch to sidemount for exactly this reason.
It’s more comfortable both in and out of the water. - You’re eyeing technical diving:
No debate here.
Sidemount gives you more room to grow.
It’s the go-to setup for caves, wrecks, and advanced techniques.
More gas. More autonomy. More freedom. - You love tinkering with gear and improving technique:
You’ll have a blast.
From adjusting the harness to clipping tanks and customizing your setup,
sidemount scuba diving is tailor-made for hands-on divers.
It’s 100% customizable.
And if you love “gear nerd” territory, it’s pure joy.
In Short: Backmount is easy, practical, and solid.
Sidemount diving is comfortable, more trustworthy, and seriously cool.
Pick the one that fits you. And if you can, try both.
Because there’s a big difference between carrying your gear…
and feeling like your gear moves with you.
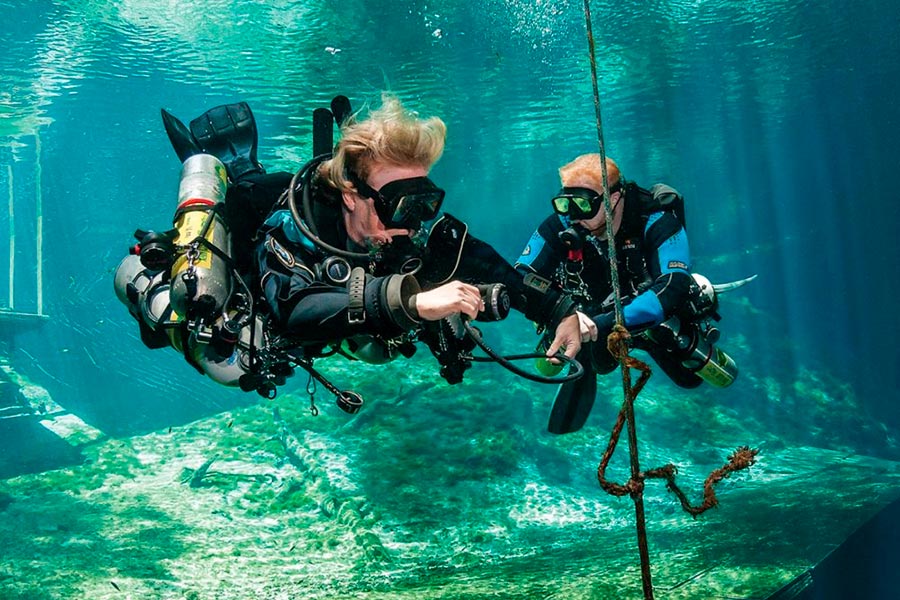
5. Your Sidemount Diving Setup: Understanding the Essential Gear
Sidemount diving isn’t just a different way to carry your tanks.
It’s a whole philosophy.
And like anything good… it starts with the gear.
There’s no “I just wear whatever they give me” here.
No way.
You build your sidemount scuba setup. You understand it. You make it fit you.
And honestly… that’s what makes it awesome.
Let’s break it down.
The Sidemount Harness: Your Underwater Skeleton
This is the heart of your sidemount diving harness.
There’s no single “right” way to wear it,
but there are some key things you need to keep in mind.
There are two main types:
- The “H” Harness: More structured, more adjustable, perfect if you want stability and precision.
- Minimalist: Lightweight, flexible, ideal if you dive in warm waters and don’t want to feel like you’re carrying a backpack.
What really matters?
That the harness fits tight against your body.
That it doesn’t move an inch.
And that every D-ring is exactly where you need it.
If you’re going to invest in anything, make it the best sidemount BCD you can afford.
Trust me. It makes all the difference.
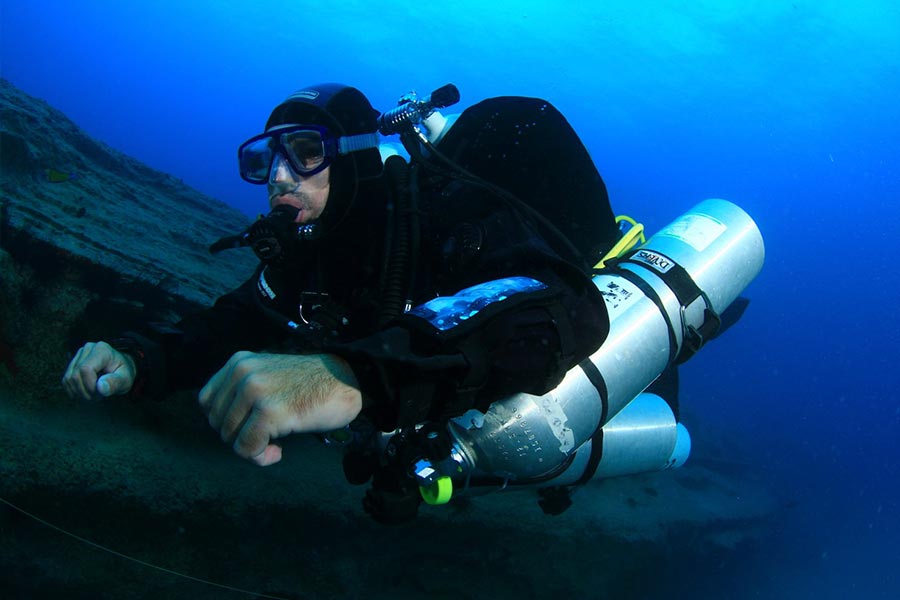
Tanks on the Sides: What Makes Sidemount Unique
In a sidemount scuba setup, the tanks go on your sides.
And that changes everything.
You’ve got to choose carefully:
- Size: Aluminum 80s are the most common, but some prefer steel.
- Pressure: Not all filling stations pump to 200 bar. Check before you dive.
- Buoyancy: Aluminum tanks become positively buoyant as they empty. Watch out for that!
Then comes the art of it all:
Rigging.
Sidemount tank rigging means attaching clips, bungees, and gear so the tanks stay aligned, tight to your body, and don’t move around.
No swinging.
No tanks flying backwards.
No looking like a Christmas tree.
Good sidemount tank rigging is the key to smooth, balanced diving.
Regulators: Not Just Any Setup Will Do
In a sidemount scuba configuration, your regulator setup changes.
You need:
- Two independent first stages.
- A short regulator (around 60–70 cm hose).
- A long regulator (at least 2 meters) for sharing air if needed.
- Two pressure gauges. One per tank. Always.
And all this… with clean routing, no dangling hoses, and easy access at all times.
It’s not about looks. It’s about function.
And in an emergency? It can save your life.
Weight and Buoyancy: Balance Is Everything
Sidemount diving is famous for its trim.
But if your weight isn’t well distributed, no matter how nice your setup looks, it won’t work.
Some tips:
- Use weight pockets on your harness.
- Spread weight across your sides, never just on your back.
- Adjust for your suit: wetsuit, drysuit, shorty… everything changes.
The goal?
Float flat. Like a board.
And never have to fight your position underwater.
")
6. Master Sidemount Diving: The Sidemount Course You Need
Got the sidemount diving itch?
Perfect.
But heads up…
This isn’t just about changing how you carry your tanks.
It’s about doing it right.
And for that, you need one thing:
A solid sidemount course.
Why take a sidemount diving course?
Because winging it underwater is not an option.
If you’re going to become a sidemount diver, you better go all in.
A sidemount diving course gives you what YouTube never will:
- Real, tested, and safe techniques.
- Total control of trim and buoyancy.
- Efficient gas usage.
- Clear, practiced emergency protocols.
- Easy, full access to your valves and regulators.
And something even more important:The peace of mind that you actually know what you’re doing.
What do you learn in a sidemount diving course?
They won’t just throw you in the water with tanks on your side and say, “Good luck!”
A good sidemount scuba course blends theory and practice.
The theory covers the why behind sidemount diving:
- The fundamentals of sidemount.
- Step-by-step gear setup.
- Safety considerations.
- Managing gas from two independent sources.
The practical side is where the magic happens: - Adjusting your harness so it fits like a glove.
- Rigging your tanks until you can do it with your eyes closed.
- Becoming a trim ninja.
- Learning to troubleshoot like a pro.
- And by the end… feeling like you were born with tanks on your sides.
Who can take a sidemount course?
Good news: You don’t need to be Jacques Cousteau to start.
But there are a couple of basics:
- Have your Open Water Diver certification (or equivalent).
- Some previous experience (many dive centers ask for at least 25 dives).
- A real desire to learn, experiment, and break out of the usual.
That said…
If you’re already Advanced, Rescue, or itching for technical diving…
You’re going to love this sidemount course.
PADI or SDI?
Both offer excellent sidemount courses.
- PADI guides you step-by-step with a solid recreational focus.
- SDI leans more technical, ideal for caves, wrecks, and underwater challenges.
You choose based on what you want.
But one thing’s for sure:
Do it with someone who really knows their stuff.
Sidemount Diving FAQ
Is sidemount diving safer?
Yes.
But hold on, it’s not magic.
Sidemount scuba can be safer if you know what you’re doing.
You’ve got two tanks. Two regulators. Two independent air sources.
And full access to your valves, no acrobatics required.
That gives you more control in case of an emergency.
But here’s the deal: it all comes down to proper training and practice.
That’s why taking a sidemount diving course is essential.
Is sidemount hard to learn?
Nope.
It’s just different, which is not the same thing.
If you already know how to dive, learning sidemount is just leveling up.
Sure, there’s a bit of a learning curve:
New harness, tanks on the sides, a bit more technique.
But nothing you can’t handle with a good instructor and a few dives.
And once you get the hang of it… you won’t want to go back to backmount.
What kind of dives can I do with sidemount?
Pretty much any kind!
Well… almost.
Sidemount was born for cave and wreck diving.
But today, recreational divers use it on reefs, easy dives, and tropical trips too.
The perks:
• You can squeeze into tight spaces.
• Carry more gas without going full-on tech.
• Top-notch buoyancy.
• Max comfort.
Looking for more freedom and self-reliance underwater?
Then sidemount scuba is your new best buddy.
Can I use my regular dive gear for sidemount?
Not exactly.
But you can adapt some of it.
Here’s what you’ll definitely need:
• A sidemount-specific harness.
• A sidemount BCD (backmount ones won’t work).
• Tanks rigged with clips and bands for sidemount use.
• Regulators configured for sidemount (long hoses, side-positioned gauges).
Bottom line:
You’ll build a whole new setup.
But it’ll be yours, tailored to fit you and your sidemount diving style.
How much does a sidemount scuba setup cost?
Depends on how high-end you want to go.
But here’s a rough idea:
• Harness + wing (best sidemount BCD): €400–800 (about 430–860 USD)
• Sidemount regulator set: €500–1000 (about 540–1,080 USD)
• Accessories (clips, bands, weights, etc.): €100–200 (about 110–215 USD)
Total estimate for a full sidemount rig:
👉 Between €1000 and €1800 (roughly 1,080 to 1,950 USD).
Keep in mind:
This is a long-term investment.
And if you’re already thinking about getting into tech diving, this is step one.
The prices listed are approximate and may vary depending on the supplier, country, or equipment specifications.
Do I need experience to start sidemount diving?
Yes, just a bit.
Here’s the minimum:
• Be an Open Water Diver (or equivalent).
• Have some dives under your belt (most courses ask for 20–25).
If you’re brand new to diving, start with backmount.
If you’re already diving confidently and want more, sidemount’s your next move.
How long is the sidemount diving course?
Usually 2 to 3 days.
It typically includes:
• A theory section (online or in-person).
• Pool or confined water sessions.
• 2 to 4 open water dives.
Just enough to get you going, and leave you hungry for more.
Interested in Sidemount Diving in the Caribbean? Contact us!